How to setup Tata photon plus on Ubuntu 10.10
If you are new to ubuntu 10.10 and don't know how to setup Tata photon plus, then this small tutorial will help you to configure Tata photon plus on Ubuntu 10.10 "Maverick Meerkat".
Note: This tutorial is for new Ubuntu 10.10 "maverick meerkat". In case you have installed Ubuntu 10.04 read our previous tutorial.
Ok, lets begin.
>> Plug-in your Tata photon plus device in one of the USB slot. Wait for a few seconds then go to the top toolbar and left-click on the network icon (like a wifi indicator). You will notice that the network menu has a new option, "New Mobile Broadband (CDMA) Connection" (see the pic below).

>> Click on the new option, it will trigger network manager to help you configure your new mobile broadband connection, i.e. tata photon.
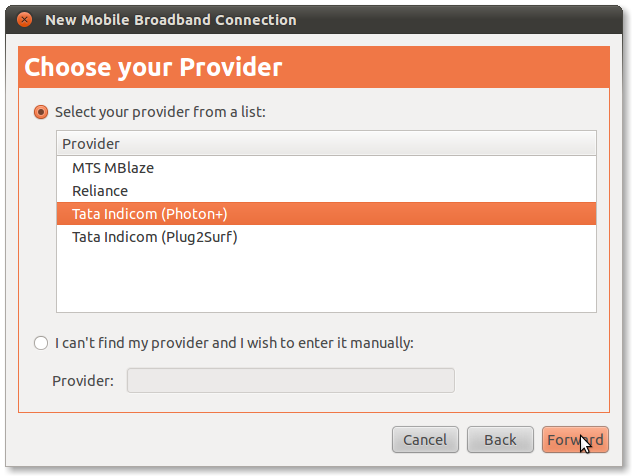
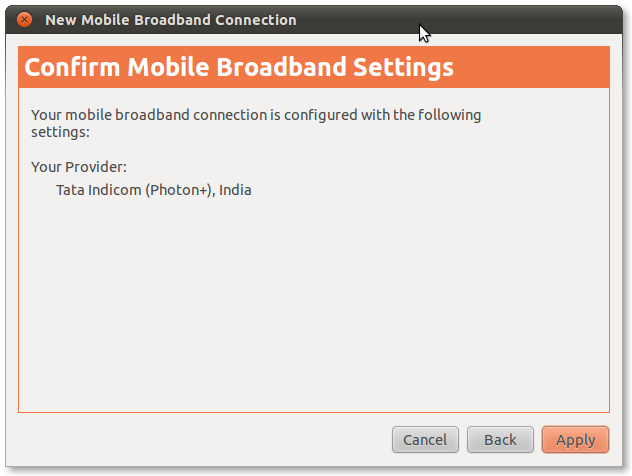
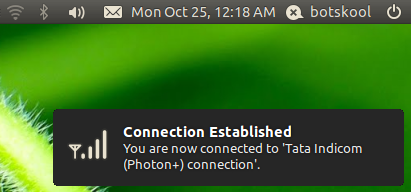
>>Follow the steps: Select your country as India, Choose your provider as Tata Indicom (Photon+) and then apply the changes. It will establish the internet connection automatically.


>> If it doesn't connect automatically or your have plugged-in your device again, then go to the toolbar, left click on the network icon, under available connection it must show "Tata Indicom (Photon+) Connection", click on it and in a few seconds the internet connection gets established.


>> To disconnect the Tata photon Internet connection, click on the network icon, and select disconnect.

Thats it. :D


