How to recover deleted files using Recuva?
Have you removed important documents from your trash or formatted a partition without backing up your data? Don't worry, it is still possible to recover such deleted files. Recuva is a free, easy to use and powerful tool for this.
Before we begin here are some important tips:
- Do not create or store new files on the hard disk or partition as it can overwrite on your deleted data!
- Always recover data to another medium: another partition, another hard drive (internal or external), USB drive, ZIP disk, etc.
- The sooner you make data recovery the more likely are the chances of restoring your complete data.
- Recuva works only if you are an administrator of your program. To run the program as an administrator, right click on the program and choose Run as Administrator.
Introduction
Recuva is a utility to restore deleted files from your computer: files emptied from the Recycle Bin, emails, pictures or other files deleted by mistake, after formatting or partitioning.
It also works on USB drives, iPods, memory cards for digital cameras or MP3 players.
Attractive Features
- Free
- Lightweight
- Regularly updated
- Runs on Windows 7/Vista/XP (32-bit and 64-bit), Windows 2000/98, as well as Windows Server 2008/2003 (all versions).
Download Recuva
In this tutorial, we will use portable version of Recuva which is lighter and operates from an external medium. We will download the Recuva on USB and then use it to recover deleted data from C: drive.
- Click here to download Portable Recuva.
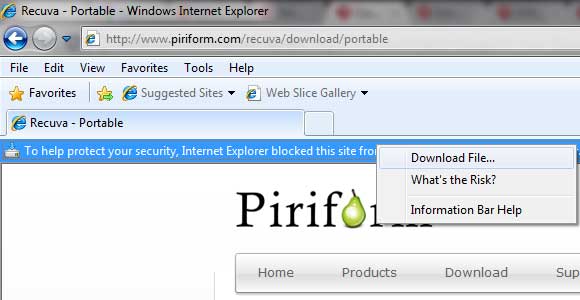
If the download is blocked by Internet Explorer blocks then just click on the blinking notice in blue color and then choose Download File.

- Save the file directly to a USB drive.
- Right click the downloaded file and select Extract here .
- Launch Recuva.exe (for 32-bit OS) and Recuva64.exe (for 64-bit OS).
Find and recover your files
- A screen welcoming you to the Recuva Wizard will appear. Click on Next to continue.

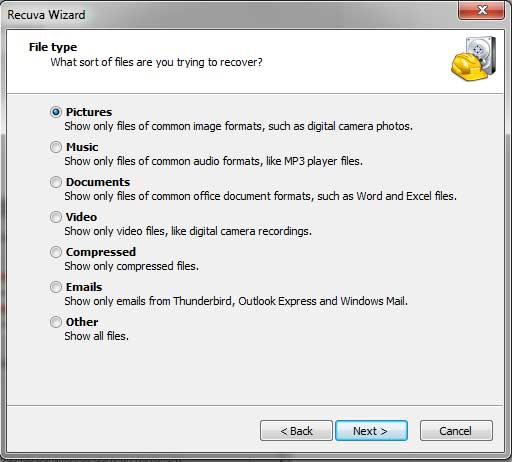
- On the next screen it will ask you the type of the file(s) to recover. Choose accordingly out of the following options - Pictures, Music, Documents, Video, Compressed, Emails, and Other.

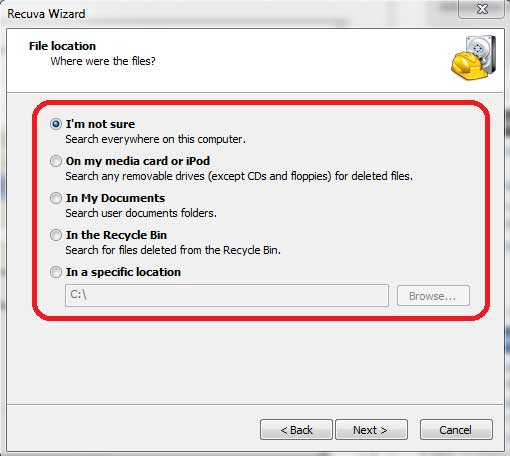
- Next you need to choose the location from where the files have to be recovered. Most likely you will choose either I'm not sure (Search everywhere on this computer) or In the Recycle Bin (Search for files deleted from the Recycle Bin). Click on Next.

- This is the final step of the wizard. Here you will see a check-box to enable deep scan. If you enable this option it will take a lot of time to scan (approximately 50 - 60 mins for 180GB data). Still you should do so as it increases the chances of recovering data. Click on Start.

- Thats it! Now sit back & relax and let Recuva do its job.

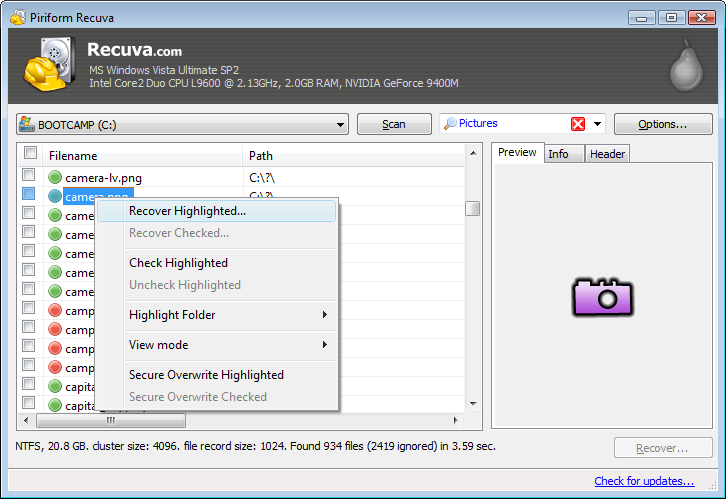
- After the scanning is over it will show you a list of all the files that can be recovered. Choose the files that you want to recover from the displayed list. Recuva uses a color-code to display whether a particular file is recover or not -
Green: File can be recovered.
Red: File has been overwritten and can't be recovered.

Note:
- Recovery can take hours depending on file size and configuration of your computer.
- Do not forget to do a virus scan on all files recovered!


